
A spa that sits several inches lower every morning, or a pump pad that floods the moment the system shuts off, points at the same quiet culprit: a check valve that no longer holds. On Jandy-style swing check valves the fix rarely involves a saw — the serviceable parts, the cover and the flapper assembly, come off with a few screws while the valve body stays glued in the line. Here is how these valves fail, how to confirm the diagnosis, and how to swap the internals in a single short visit.
What the check valve is protecting
Check valves do unglamorous but critical work on a pool pad:
- Between spa and pool plumbing, they keep an elevated spa from draining back to pool level whenever the pump stops.
- Ahead of a chlorinator or chemical feeder, they stop chemically saturated water from migrating backward toward the heater when flow stops — the classic slow killer of heat exchangers.
- On solar systems, they prevent panels from draining back and dumping air into the plumbing at every shutoff.
- On suction-side runs, they help a pump that sits above water level hold its prime between cycles.
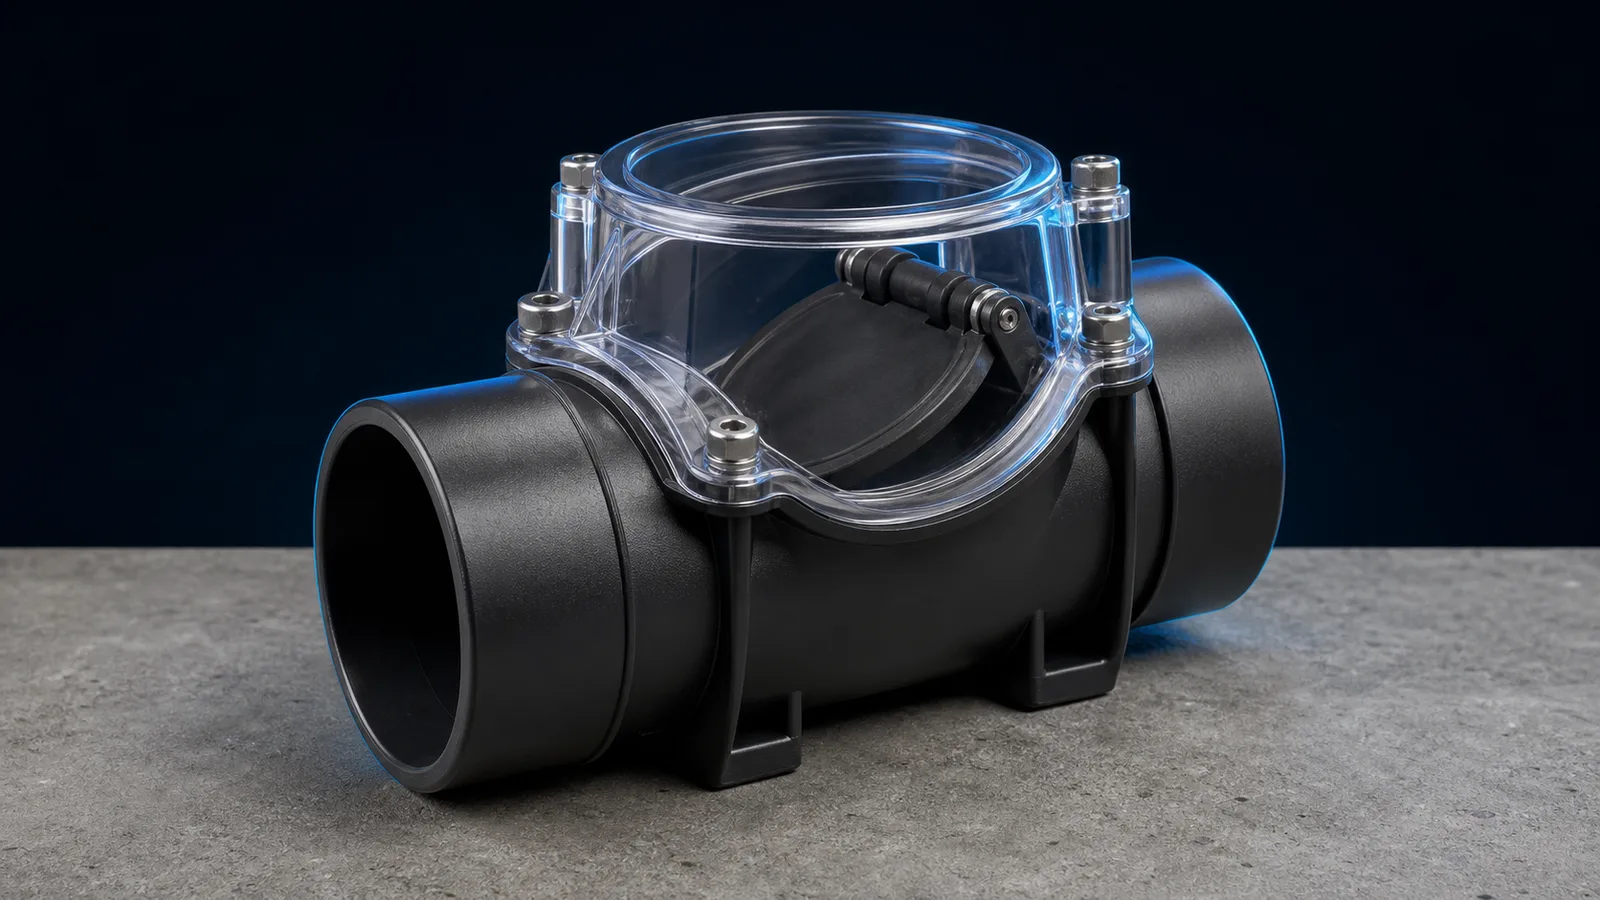
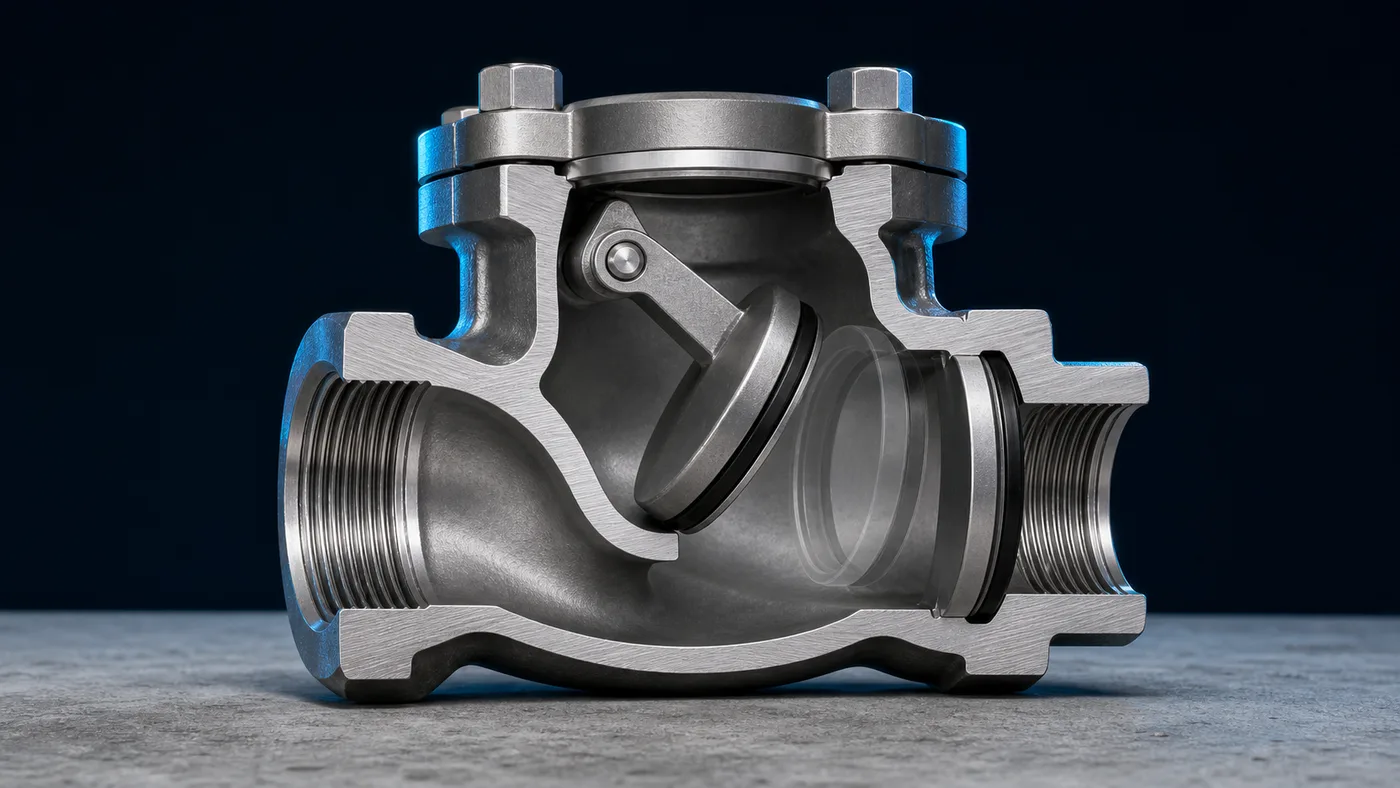
Each valve is a one-way gate. Moving water pushes the flapper open; when flow stops, the flapper swings shut against its seat and back-pressure holds it there. The whole mechanism hangs from the underside of the cover, which is exactly why the repair does not require cutting pipe.
Why flappers fail
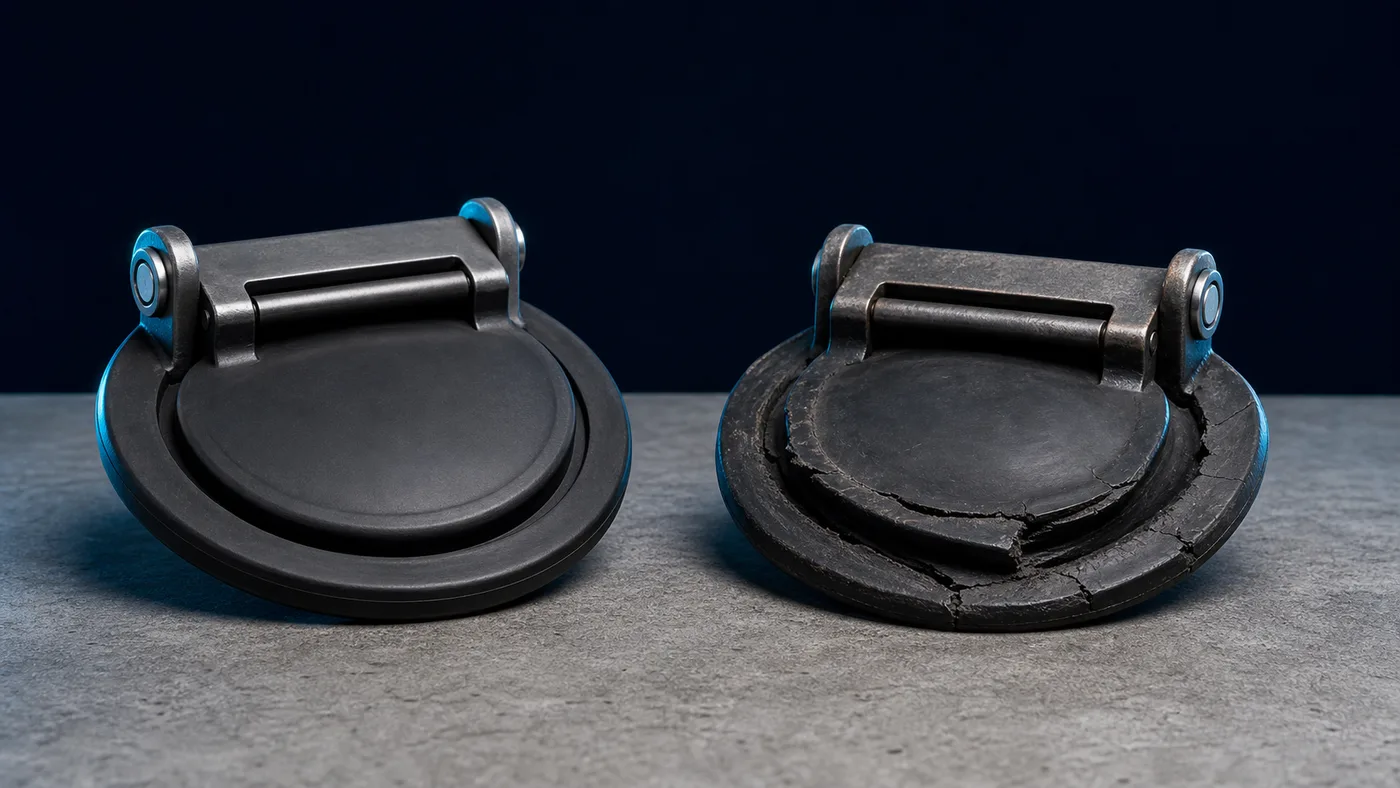
The flapper works in a hostile environment. On the chlorinator line it sees the most chemically aggressive water on the entire pad, and oxidizers gradually harden and craze the rubber sealing surface until it no longer conforms to the seat. Near a heater it takes heat cycling on top of that. Mechanically, the flapper opens and closes with every pump cycle — on a system running multiple cycles a day, that is thousands of actuations per season — and the hinge area wears until the flapper no longer centers on its seat. Debris does the rest: a pebble, a wad of leaves or a single pine needle lodged on the seat holds the valve cracked open, and a check valve that cannot close is functionally no valve at all.
Failure is usually gradual. A flapper that seals ninety percent of the way produces a slow overnight spa drop that owners blame on evaporation, sometimes for months, before anyone looks at the pad.
Symptoms worth trusting
- The spa level drops toward pool level overnight, then holds — the water is equalizing back through the plumbing, not leaking into the ground.
- Water pours from the pump lid or a pad joint right after shutdown, or the equipment area is wet every morning.
- A pump that primed reliably for years now needs the lid filled at every start.
- A pad with a chemical feeder starts showing corrosion or staining at the heater — suspect the feeder's check valve immediately.
- An audible clunk from the plumbing at every shutdown as a worn flapper slams home instead of closing smoothly.
To confirm, mark the spa water line, run the system normally, shut it down and check the mark after an hour. A valve with a transparent cover makes it even simpler: watch whether the flapper actually returns to its seat when the pump stops.
Replacing the cover and flapper without cutting pipe
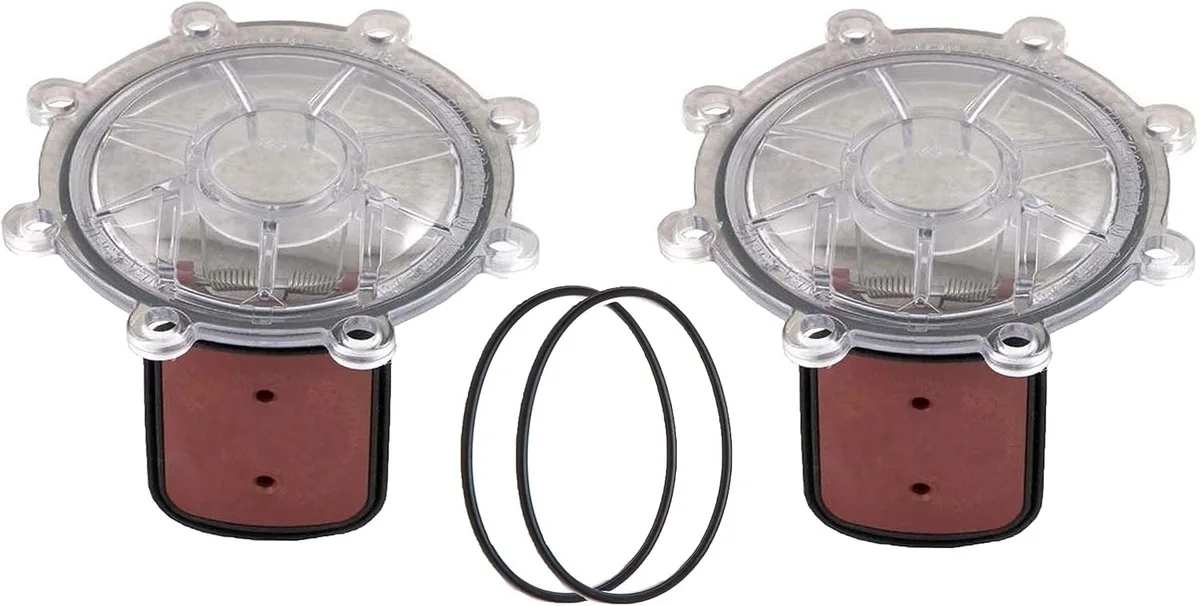
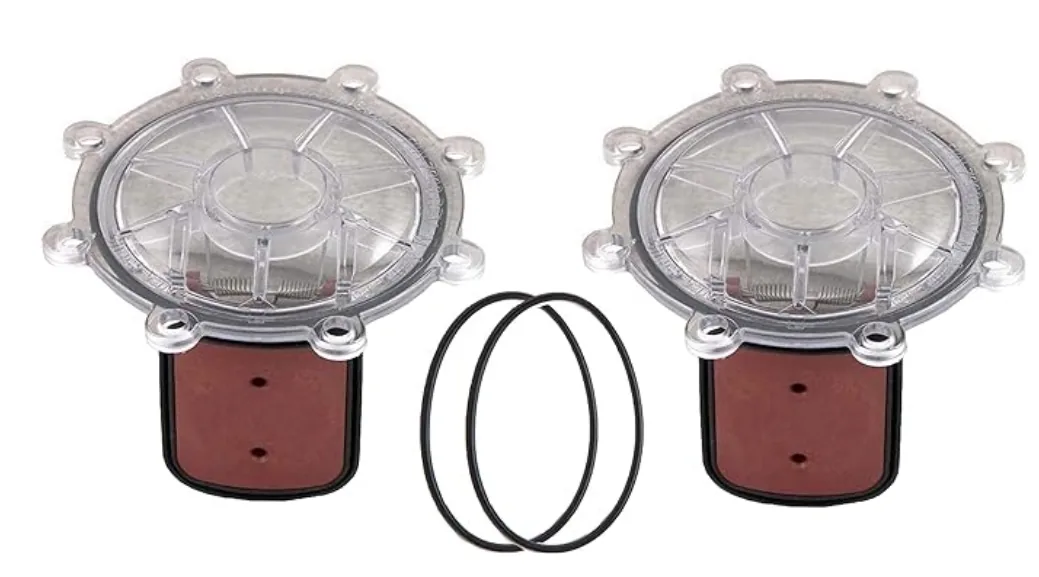
The valve body is welded into the plumbing, but everything that wears is attached to the cover. POOLPOINT's 7056 check valve cover with flapper assembly replaces the complete serviceable mechanism in one piece.
- Shut off power to the pump at the breaker, not just the timer, and relieve pressure at the filter's air relief valve.
- Isolate the section of plumbing if the pad's valves allow it. On a spa line, remember the elevated water will come down through the open valve — position other valves accordingly and expect some water regardless.
- Remove the cover screws and lift the cover straight out; the old flapper assembly comes with it.
- Inspect the seat inside the valve body. Wipe off scale and debris. A deeply gouged or heavily scaled seat is the one finding that puts body replacement on the table.
- Set the new cover and flapper assembly in place, oriented so the flapper swings open in the direction of the flow arrow on the body.
- Tighten the cover screws evenly in a cross pattern until snug. Running one screw to full depth before the others cocks the cover and pinches the seal.
Restore power, prime the system, then shut it down and watch. The spa should hold its level and the pad should stay dry. The whole job takes minutes, which is why this part belongs on the truck rather than in a special-order queue.
Cross-reference table
The 7056 assembly serves the Jandy swing check valve numbers below. Match the number molded on your existing valve or cover before ordering.
| OEM number | POOLPOINT part | Notes |
|---|---|---|
Jandy 1132 |
7056 |
Cover with flapper assembly |
Jandy 7056 |
7056 |
Direct cross |
Jandy 7235 |
7056 |
Cover with flapper assembly |
Jandy 7236 |
7056 |
Cover with flapper assembly |
Jandy 7302 |
7056 |
Cover with flapper assembly |
Jandy 7304 |
7056 |
Cover with flapper assembly |
Jandy 7305 |
7056 |
Cover with flapper assembly |
Jandy 7451 |
7056 |
Cover with flapper assembly |
Jandy 7511 |
7056 |
Cover with flapper assembly |
Jandy 7512 |
7056 |
Cover with flapper assembly |
A stocking note for distributors and service companies
Check valve internals are a high-turn consumable. Every pool/spa combo pad has at least one, chemical feeders add another, and because the failure mode is progressive, experienced techs replace flappers on suspicion rather than waiting for total failure. One SKU that answers the full range of Jandy swing check numbers above keeps truck inventory simple: one box on the shelf, ten OEM numbers covered.
Sourcing
POOLPOINT manufactures the 7056 cover and flapper assembly factory-direct for US distributors, pool service companies and online sellers. MOQ starts at 50 pcs per SKU and private label packaging is available — request a quote for wholesale pricing.